Getting Started: Create Your Klaviyo Account
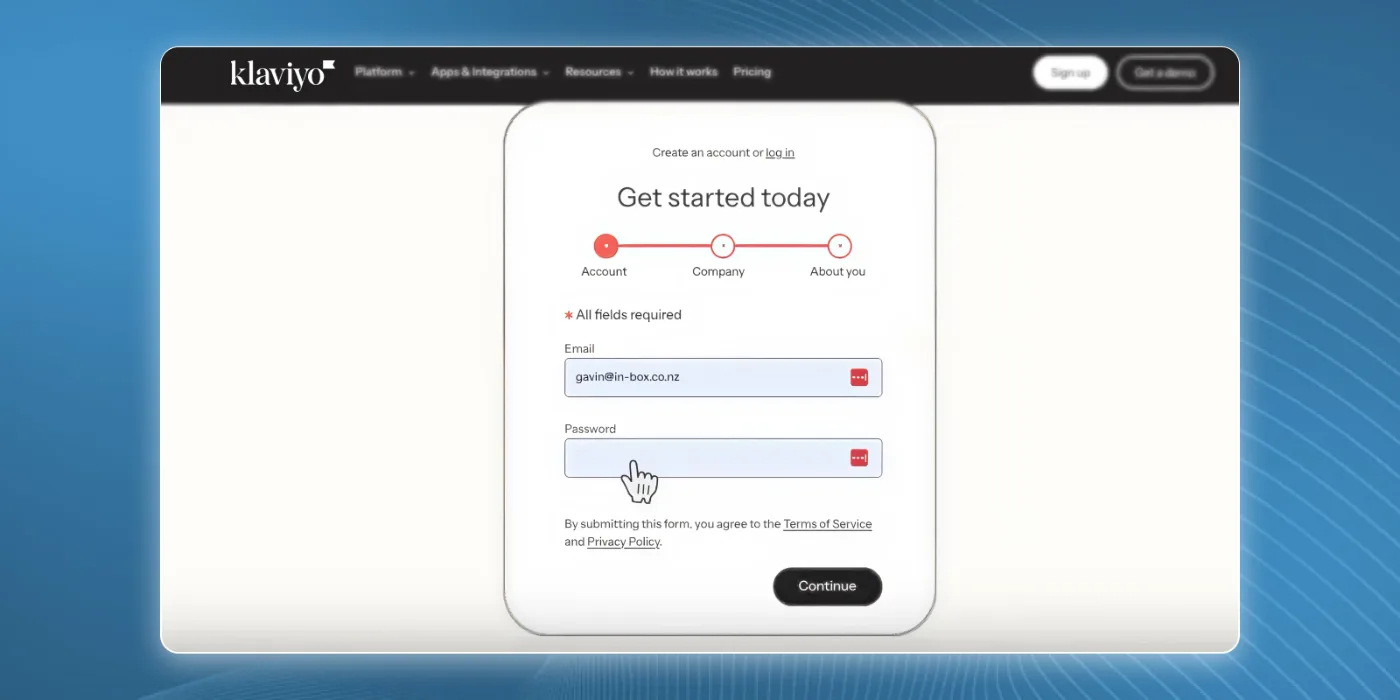
The first step to using Klaviyo is creating your account. Follow these straightforward steps:
- Head to Klaviyo and click Sign Up.
- Enter your email address, this should be your inbox you actively monitor (not the business’s generic email). This becomes your primary login user.
- Set a secure password. If you’re an agency managing multiple accounts, use a consistent password you’ll remember across client accounts.
- Click Continue to begin building your account.
This sets up your user identity inside Klaviyo before you start configuring the business details.
Input Your Business Details
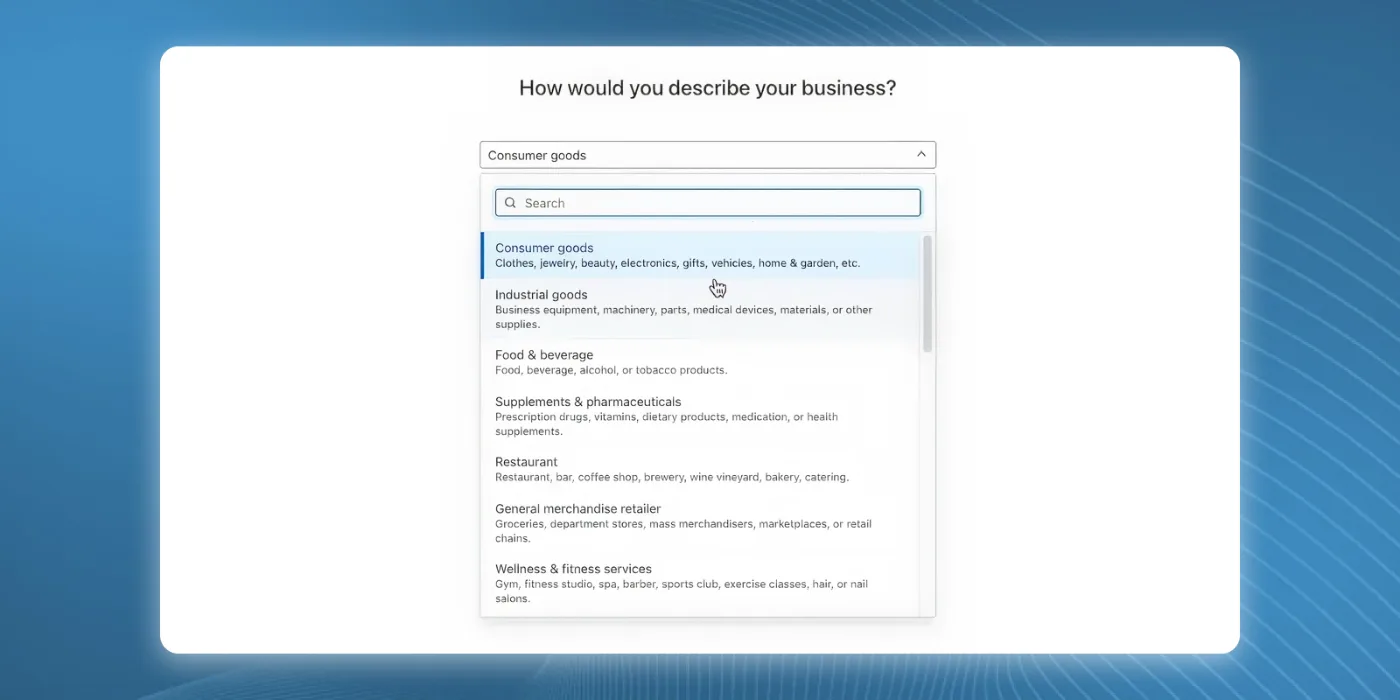
Once you’ve created your login, Klaviyo will ask for business information to tailor the account setup:
- Website: Enter the brand site this account represents.
- Company Name: Use your brand name (doesn’t have to be the legal name).
- Phone Number: Add a contact number you can be reached at.
- How You’ll Use Klaviyo: Select whether this is for your own business or a client’s.
- Optional settings like a live walkthrough can be skipped now, you can always explore them later.
Lastly, Klaviyo will send an authentication code to verify your email. Enter that to continue.
Categorise Your Business
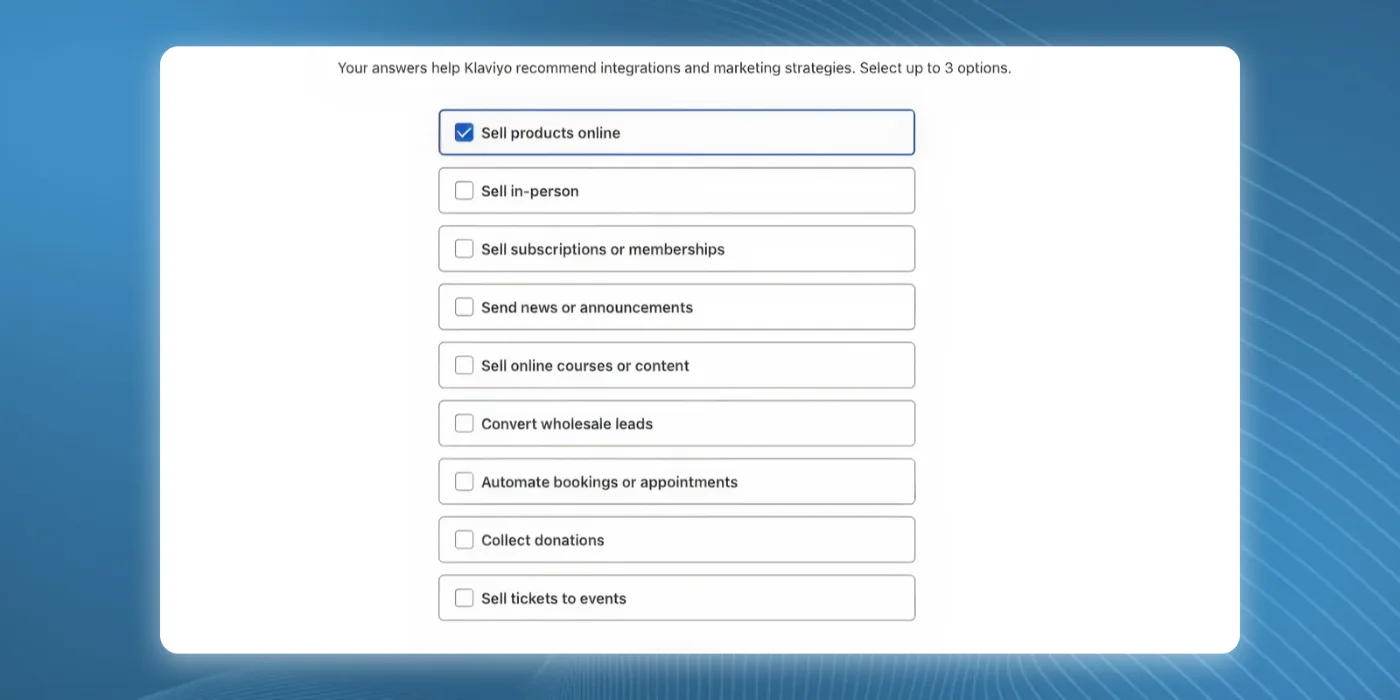
Klaviyo uses this information to compare your account to similar businesses in its analytics, helping benchmark open rates, engagement, and performance.
- Industry: Pick the closest match (e.g., Consumer Goods).
- Platform: If you already know your ecommerce platform (Shopify, WooCommerce, etc.), choose it. If not, you can skip and integrate later, more on integrations in a separate guide.
- Contact Count: Select your approximate number of contacts (this helps Klaviyo estimate billings later).
Make sure this data reflects your real business or your client’s business if you’re setting this up as an agency.
Add Your Business Address
This isn’t optional, Klaviyo asks for a physical business address for compliance with email sending regulations.
Enter:
- Business address
- City
- Country
- ZIP code
This ensures Klaviyo can correctly configure your sending defaults and uphold compliance with email standards.
Choose Your Sending Identity
Who your messages come from matters for engagement and brand recognition. Klaviyo will ask you to fill in:
- Sender Name:
- Founder-led brands tend to do better when emails show a real name (e.g., Gavin from Inbox).
- Product or faceless brands can use the company name instead.
- Sender Email Address:
- Use an email you regularly monitor (e.g., support@yourbrand.com).
- Avoid non-existent inboxes, replies must land somewhere active.
Choosing your sender identity thoughtfully improves opens, trust, and replies.
Select How You Want to Use Klaviyo
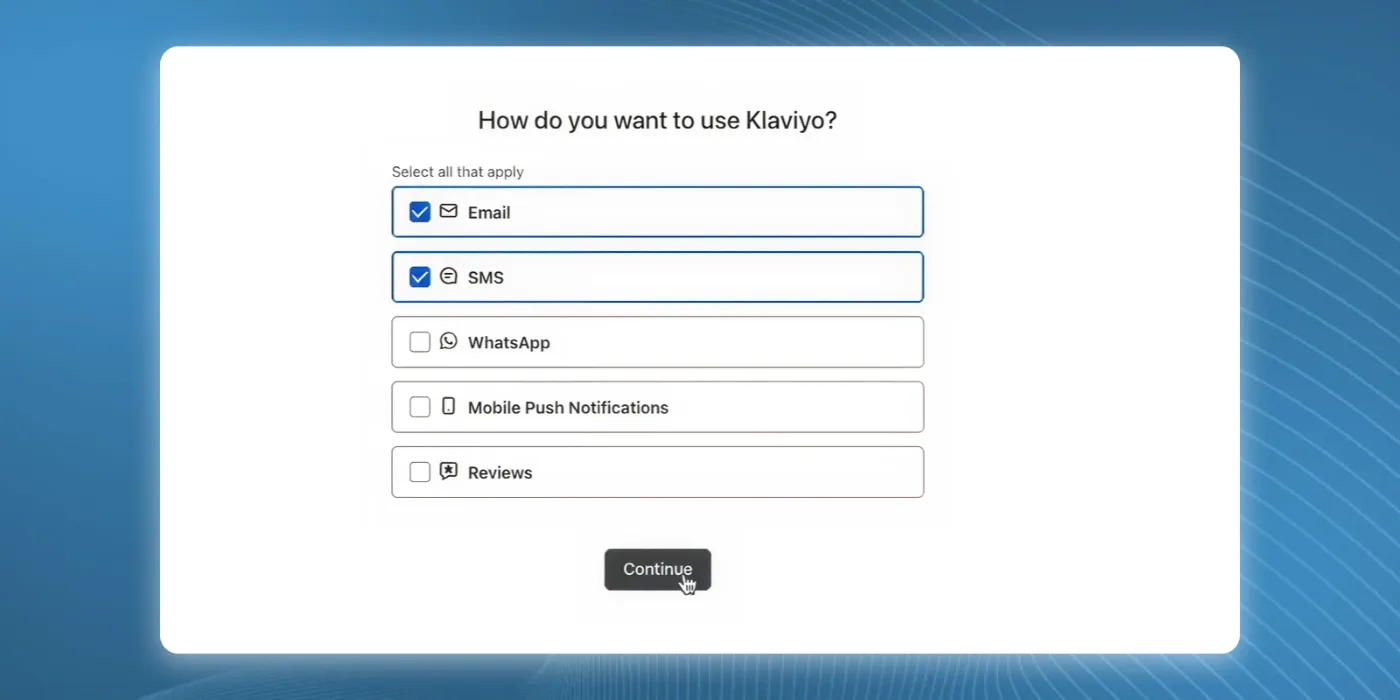
Klaviyo supports:
- Email Marketing
- SMS
- WhatsApp
Most brands start with email and SMS together, you can enable other channels here or add them later once you’re active in your account.
If SMS is part of your strategy, make sure you align it with best practices (e.g., permission signup flow, message timing) as outlined in our SMS Marketing in Klaviyo guide.
Start on the Free Plan (Optional)
Right now, if you’re just getting started and don’t have any lists built yet:
- Choose the free plan.
- This offers up to 250 active profiles and 500 monthly sends, a perfect sandbox while you build your ecosystem.
Klaviyo will show paid plan options here, but you aren’t required to upgrade immediately. Billing and plan differences will be covered in deeper modules once your setup is complete.
Related Reading
Before you begin building campaigns and flows, it’s worth exploring insights that go hand-in-hand with your Klaviyo setup:
- Want ideas for your first automated journeys? Check out Welcome Email Series: The Complete Guide to Converting New Subscribers.
- For tools that make managing Klaviyo quicker and more accurate, see AIM by Aimerce: A Smarter, Faster Way to Manage Klaviyo.
- Thinking about how Klaviyo stacks up against alternatives? Our comparisons, like Klaviyo vs Omnisend and ActiveCampaign vs Klaviyo, help you decide where this platform fits your goals.
Final Thoughts
Setting up Klaviyo is one of the most important foundational steps you’ll take for your email and SMS marketing performance. Getting the details right upfront, from sender identity and address to platform integration and usage, saves time, improves deliverability, and positions you for strategic growth as you expand your automations and campaigns.
Remember, this setup phase isn’t where your work ends; it’s where your strategy begins. A good setup paired with strong flows and thoughtful campaign structures leads to higher engagement, better brand relationships, and measurable ROI.
Once you’ve completed this process, the next steps are building your core automated flows, segmenting your list, and harnessing Klaviyo’s analytics to optimise performance, everything that truly makes Klaviyo work for your business.
Ready for a deeper guided walkthrough?
👉 Watch the full setup on YouTube.